
When my best friend Maya got engaged, her happiness was so bright that it filled every conversation. We spent hours talking about dresses, flowers, and dreamy venues. But a few weeks later, I noticed something had changed. Her excitement slowly turned into stress.
She had sticky notes everywhere, hundreds of Pinterest boards, and a dozen unfinished to-do lists. Every decision felt too big, too confusing, and too time-consuming.
One evening, over coffee, she sighed and said, “I don’t even know where to start anymore.”
That night, we sat together and created a simple, month-by-month wedding planning timeline. Once she had a clear plan, everything started falling into place. Her smile came back, and she finally felt in control again.
If you can relate to Maya, this guide is for you. Here’s your ultimate wedding planning timeline to help you plan your dream day like a pro with joy, ease, and confidence.
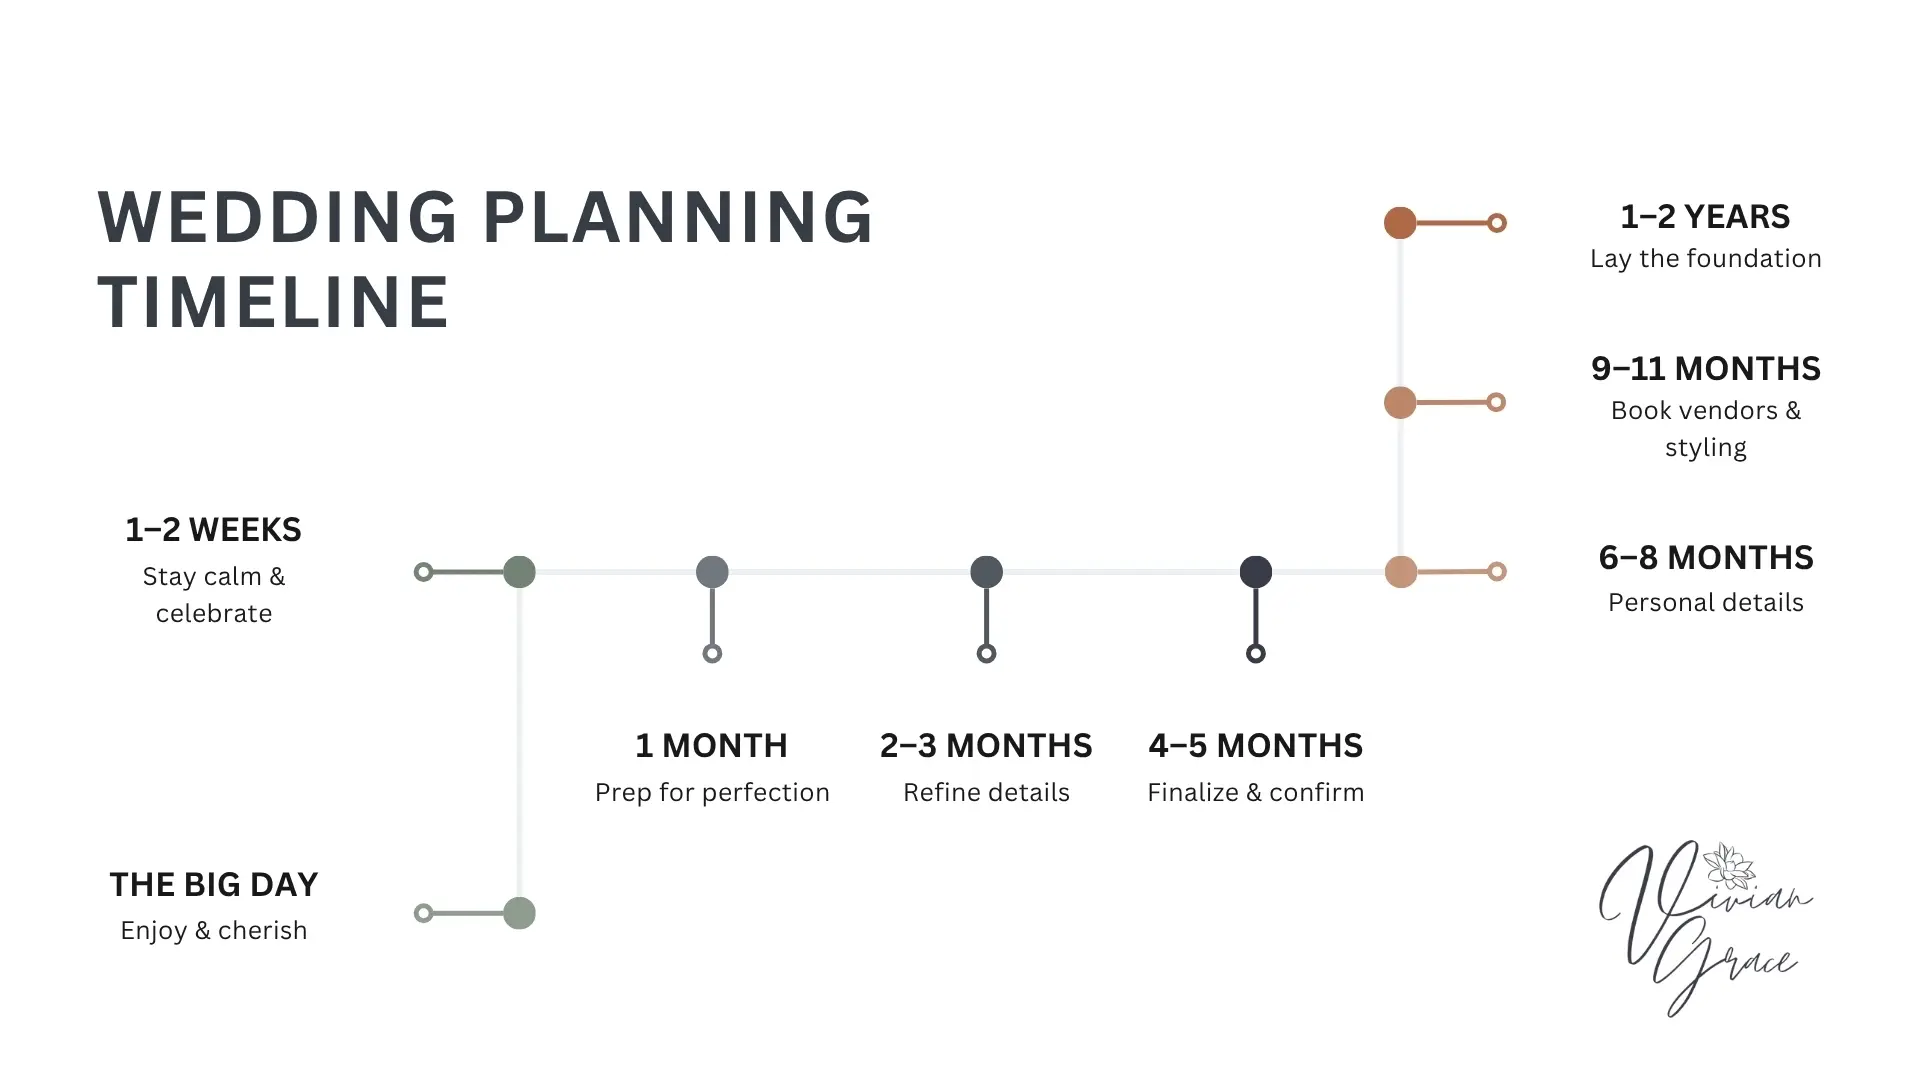
At a glance
Stage |
Goal |
Key Takeaways |
1–2 Years |
Lay the foundation |
|
9–11 Months |
Book vendors & styling |
|
6–8 Months |
Personal details |
|
4–5 Months |
Finalize & confirm |
|
2–3 Months |
Refine details |
|
1 Month |
Prep for perfection |
|
1–2 Weeks |
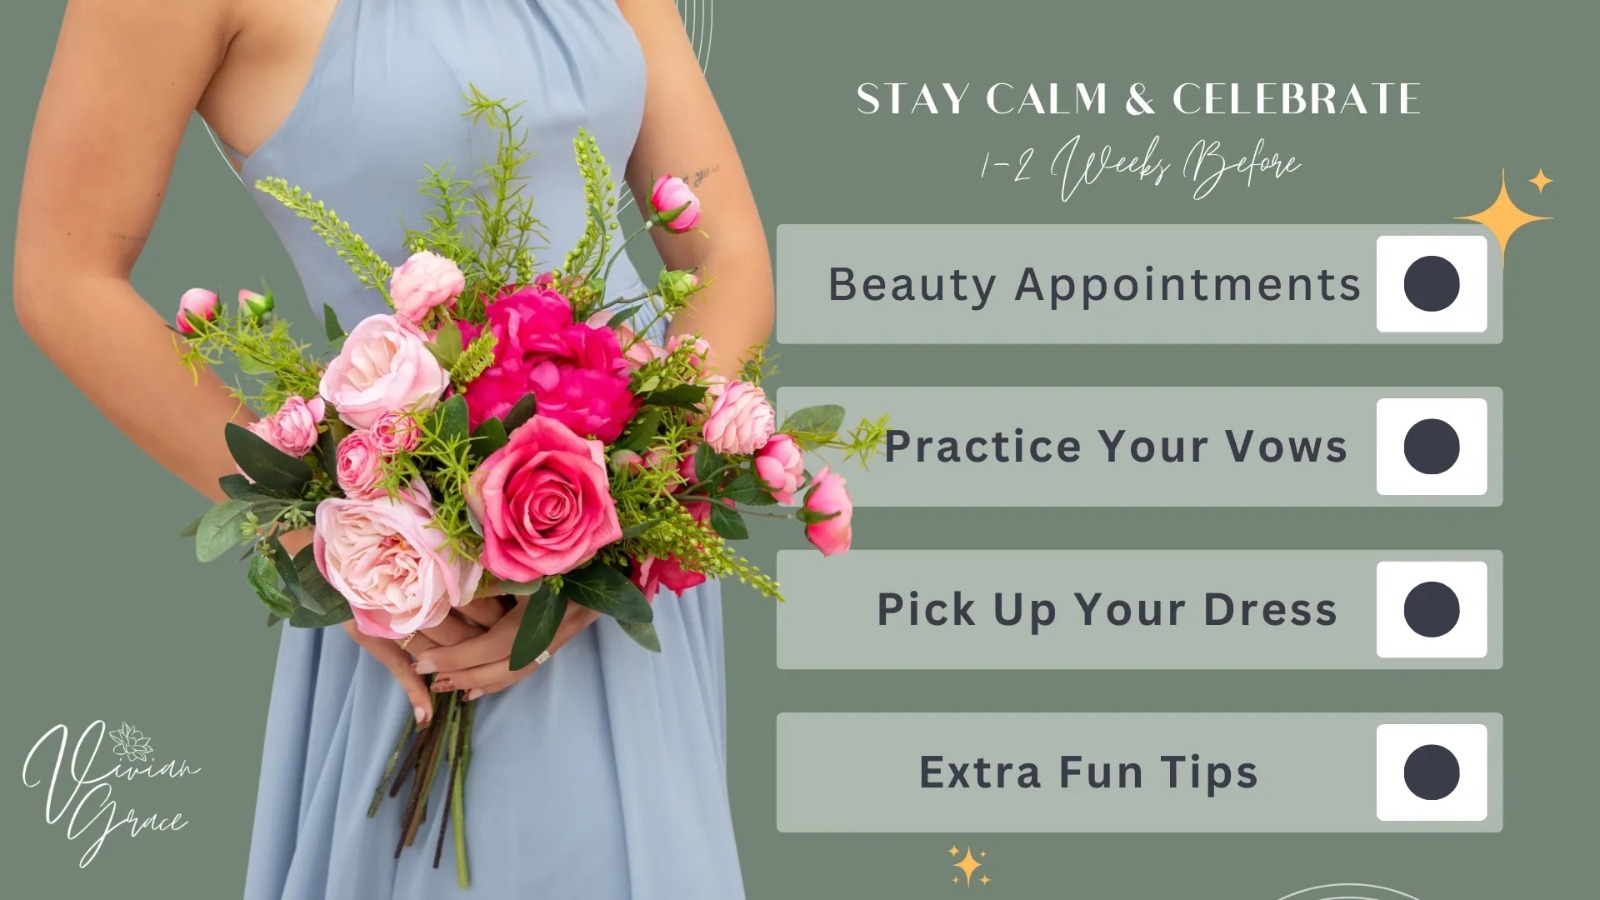
Stay calm & celebrate |
|
The Big Day |
Enjoy & cherish |
|
When Maya began planning her wedding, she felt both excited and a little lost. There were so many ideas and so many choices that she didn’t know where to begin.
But once she focused on the basics like her budget, guest list, and venue, everything started to fall into place. If you are just getting started like Maya, this is the moment to build your foundation and give your dream wedding a clear direction.
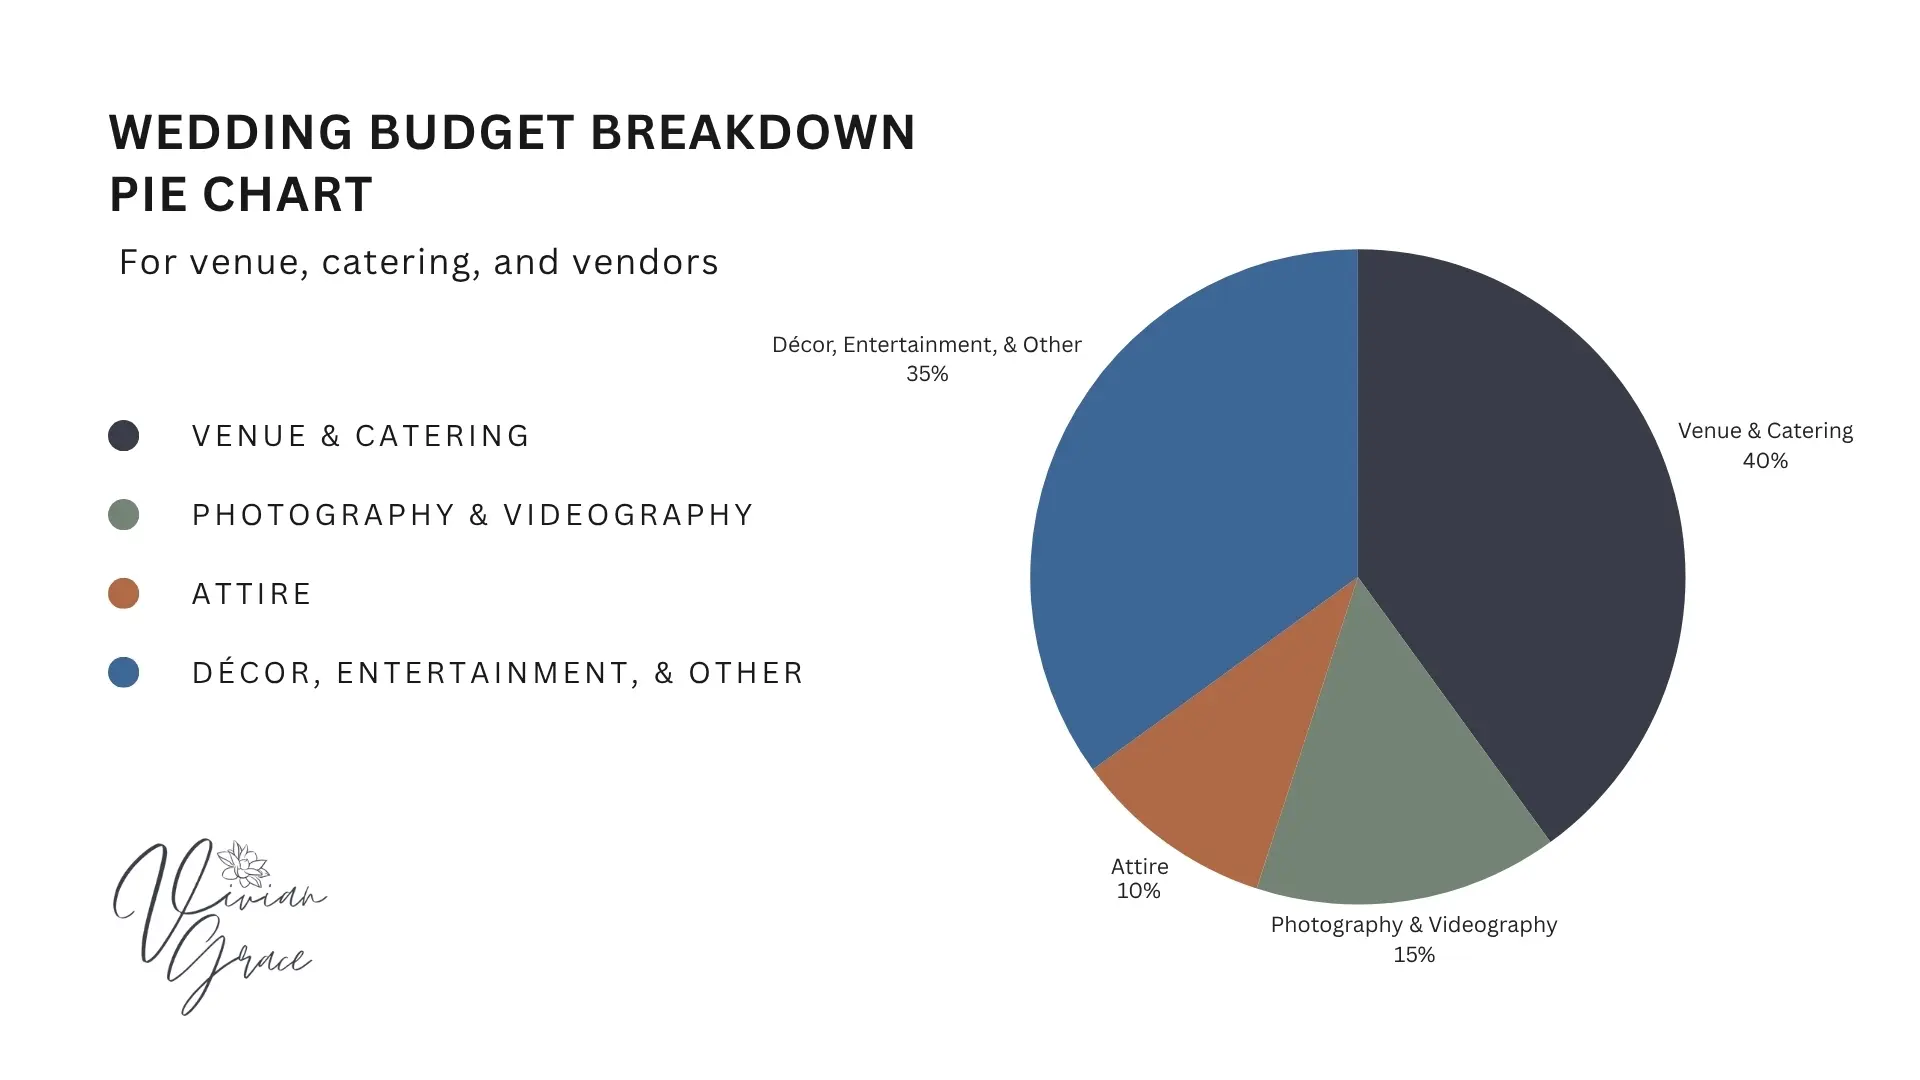
Goal: This stage is about setting your budget, choosing your venue, and organizing the first big steps so everything ahead feels easier and more structured.
Key Tasks:
I remember telling Maya that the first step is always about money, even if it feels a little uncomfortable to discuss. Sit down with your partner and anyone who might be contributing, and have an honest conversation about how much you can spend.
When Maya did this, she realized her total budget was around $25,000, which helped her plan every other detail with clarity.
Decide how to divide it. For example:
For more guidance, you can also check our wedding budget guide to understand how to structure your costs better.
I suggested to Maya that she list down everyone she really wanted at her wedding. You don’t need the exact number yet, just a rough idea. This helped her to choose a venue that fits comfortably and estimate catering costs.
Next, I told Maya to look at dates and venues together. Once you know your budget and estimated guest count, visit a few places that match your style. Book as early as possible because popular venues can fill up a year in advance.
Maya chose a Saturday in early summer and booked her venue over a year ahead. This gave her peace of mind and allowed her to plan everything else without stress.
I could see Maya’s eyes light up when we started talking about colors and flowers. She pulled out a stack of magazine clippings, opened her Pinterest boards, and even had a little folder on her phone full of décor ideas.
We spent an afternoon flipping through them together, laughing at some over-the-top ideas and circling the ones that really felt like “her.”
Maya wasn’t sure at first if she wanted a planner, but I reminded her that even a few hours of guidance can save a lot of stress.
A planner can manage vendors, timelines, and contracts, leaving you free to enjoy the creative and fun parts of planning. After thinking it over, she decided to hire one for a few key months, and it turned out to be one of the best decisions she made.
Pro Tip:
Start early and keep everything organized in one place, whether it’s a notebook, folder, or digital spreadsheet. When the basics are settled, everything else falls into place more smoothly and feels much more joyful.
By the time Maya reached this stage, she was feeling both excited and a little nervous. The big decisions were starting to come together, but now it was time to turn her ideas into reality.
I reminded her that this was the point to start building her vendor team and shaping the look of her wedding so everything would feel cohesive.
Goal: Book your essential wedding vendors and start defining your wedding style. This stage helps you plan your wedding step by step by choosing photographers, caterers, entertainment, and décor.
Key Tasks:
I told Maya to focus on the vendors who mattered most to her. She spent a weekend meeting photographers and videographers, flipping through their portfolios, and imagining how each one would capture her wedding day.
After a few calls and site visits, she booked her favorites. For catering, she chose a team that understood her style and made tasting the menu a fun part of the planning.
Maya’s eyes sparkled when she tried on her first dress. We scheduled a few more appointments to explore styles, fabrics, and silhouettes.
At the same time, she started coordinating outfits for her bridesmaids and groomsmen that made sure everyone felt comfortable and looked cohesive.
I reminded Maya that some of her guests would be traveling from out of town. Together, we looked for hotels close to the venue and blocked a few rooms in advance.
She then shared all the details on her wedding website so her friends and family could easily make their bookings and plan their stay without any hassle.
We talked about the people who would stand by her side. I asked her to think about friends and family who make her feel calm, happy, and supported. She carefully picked her maid of honor, best man, bridesmaids, and groomsmen.
These are the people who will cheer you on, help you through stressful moments, and share in your joy, so choosing them carefully is important.
Pro Tip:
Schedule dress fittings and vendor meetings early. Maya learned that giving herself plenty of time for alterations, confirmations, and adjustments prevented unnecessary stress and allowed her to enjoy the process.
When Maya reached the six-month mark, she was buzzing with excitement but also starting to feel the details piling up. I reminded her that this stage is all about personalizing the wedding and making it truly hers.
Goal: Take the ideas you love and start turning them into real moments that will make your wedding unforgettable.
Key Tasks:
I sat down with Maya at a local jeweler and reminded her that rings are a symbol of your commitment. We explored metal types, designs, and engraving options together.
I suggested she allow extra time for sizing and customization so the rings would be ready well before the wedding day. By the end of the visit, Maya had picked a pair that felt perfectly “them” and scheduled the final adjustments.
Maya loves food, so this part was exciting for her. We coordinated with the caterer to finalize dishes, keeping in mind dietary requirements for guests.
I encouraged her to schedule a tasting session so she could sample the flavors and presentation. We tried everything beforehand. Too delicious!!! Maya felt confident that her guests would enjoy every bite.
I reminded Maya that entertainment sets the tone for the celebration. We met with a few DJs and a live band, listened to their sample performances, and discussed our favorite songs.
I helped her create a playlist of must-have songs and special dances. By the end of it, Maya had a clear idea of how her reception would sound and feel, which made her even more excited for the big day.
I explained to Maya that some of the practical steps cannot be left to the last minute. She applied for her marriage license, bringing all the necessary identification and checking any waiting periods.
We also reviewed her vendor contracts together, confirming all services, payment schedules, and details. When Maya saw all the details confirmed, she could finally breathe and enjoy the excitement of planning.
Pro Tip:
Keep a shared Google Sheet or digital folder to track vendor contacts, payments, and deadlines.
Goal: At this stage, your focus should be on locking in the details. Finalize your décor plan, confirm all major bookings, and test your hair and makeup looks. You’ll also send invitations, track RSVPs, and prepare gifts for your wedding party.
Key Tasks:
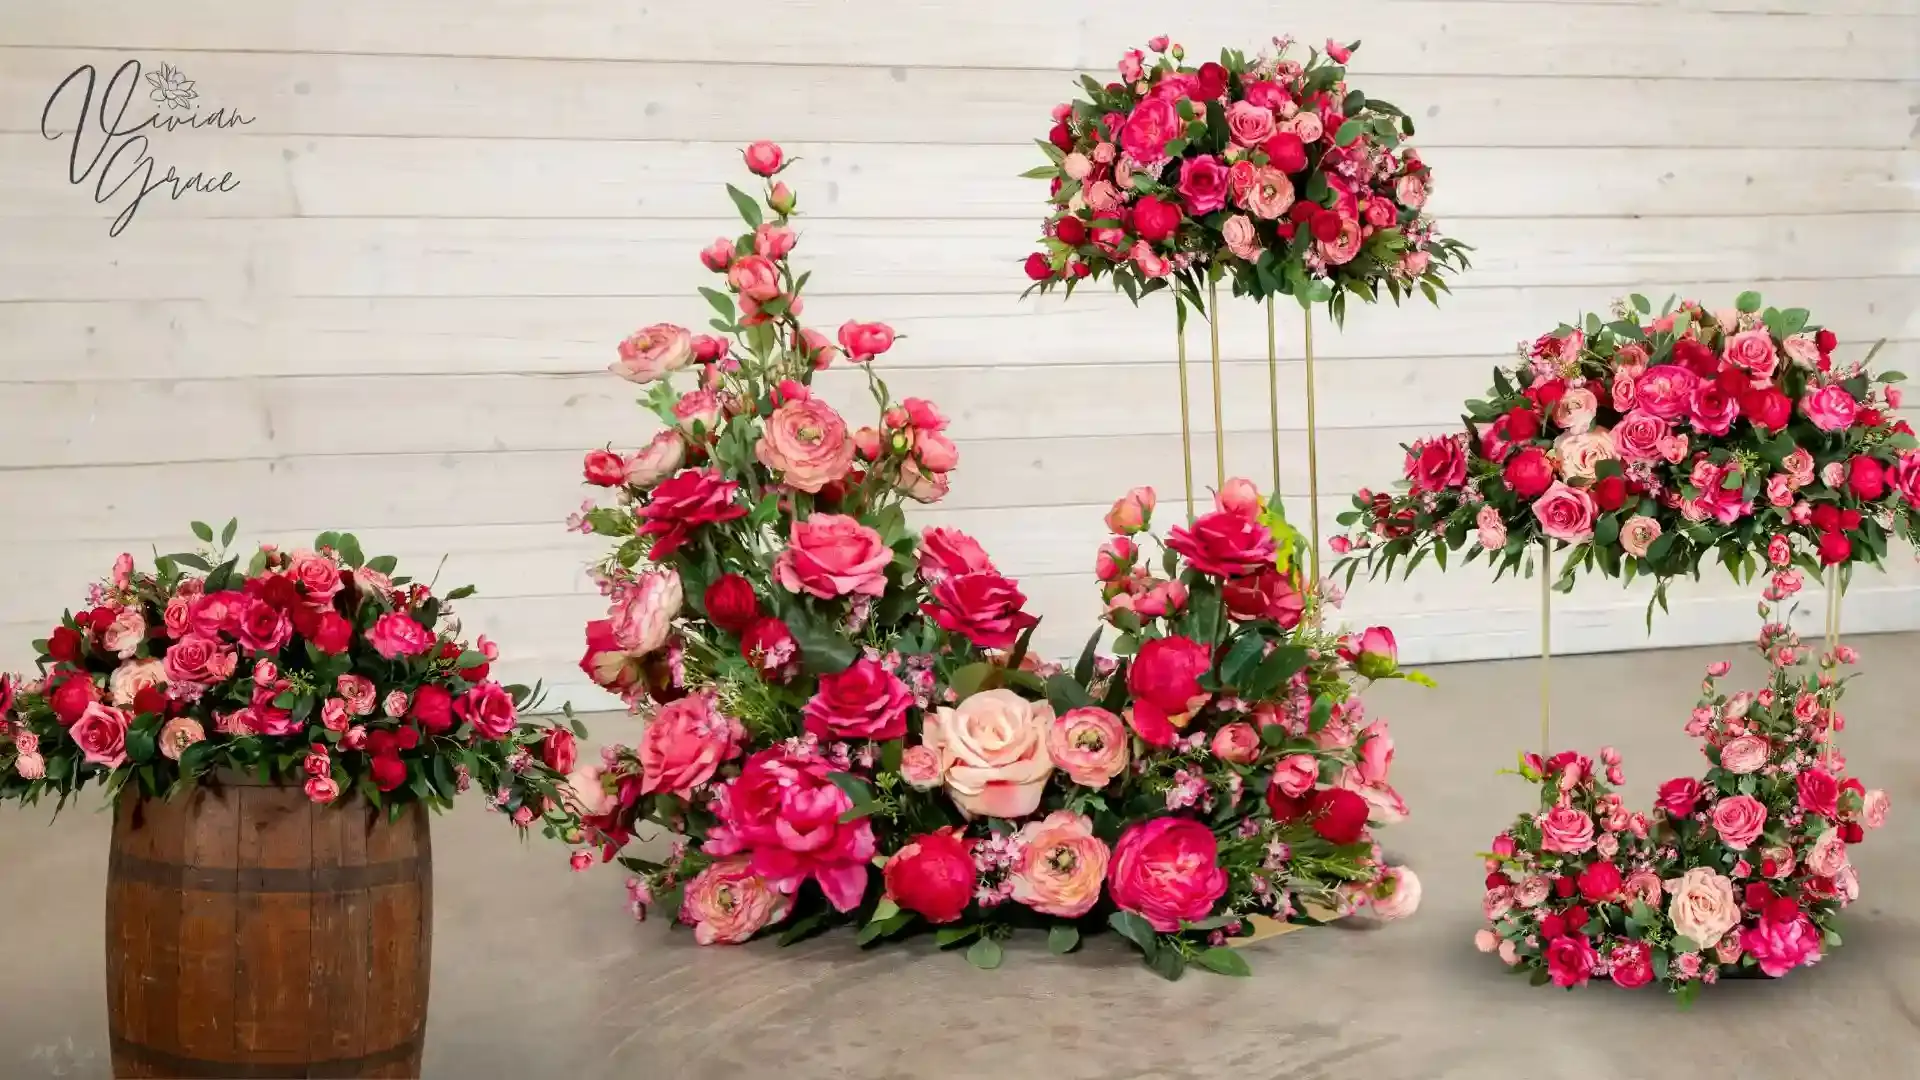
One afternoon, Maya and I met with her florist to go over the final décor plan. She brought swatches of her bridesmaids’ dresses and a few Pinterest photos she had saved months ago. Together, we combined soft blush tones with ivory accents to create a romantic and timeless look.
Instead of fresh flowers that might wilt in the heat, Maya decided to use premium silk floral rentals for her centerpieces and arch. They looked incredibly lifelike, photographed beautifully, and were easier to manage.
We set everything on a mock table with candles and table décor essentials, linens, and floral runners.
When Maya booked her hair and makeup trial, she was excited but also unsure about which look would suit her best. She brought along some reference photos, her veil, and a few hair accessories.
After trying a few options, she chose soft waves and a natural glow that matched her dress perfectly.
If you are scheduling your trials, plan them early so there is time for adjustments. You should think about the season, lighting, and how long your makeup will need to last throughout the day.
I still remember the day Maya opened the box of her printed invitations. Her face lit up with excitement as she said, “It finally feels real.”
We spent the evening assembling envelopes with wax seals and small handwritten notes for close friends. Each invitation included RSVP details, the dress code, and a simple map of the venue.
Maya wanted her guests to feel the warmth of her celebration even before they arrived, and every small gesture reflected the love behind her planning.
As the responses started coming in, Maya created a simple spreadsheet to keep track of them. She color-coded each name to make it easy to see who had replied and who still needed a reminder. It made updating her caterer and venue so much easier later on.
Maya wanted to thank her wedding party uniquely. She ordered personalized candles for her bridesmaids and engraved cufflinks for the groomsmen.
For her guests, she chose small jars of local honey tied with satin ribbons that matched her color theme. It was a small gesture that made everyone feel appreciated.
Pro Tip:
If you are planning a destination wedding, handle the legal paperwork as early as possible.
Some countries require translated documents, such as birth certificates, to be submitted at least three months in advance. Maya almost missed this step, but her planner caught it just in time.
Goal: Finalize the small but important details that make your wedding day feel organized. This is the time to confirm vendors, schedule final fittings, plan your photography timeline, and start writing your vows so everything comes together smoothly on the big day.
Key Tasks:
When Maya went for her final dress fitting, she could not stop smiling at her reflection. The gown fit perfectly, and in that moment, everything felt like a dream.
I reminded her to bring her shoes, jewelry, and even the undergarments she planned to wear so the seamstress could make the right adjustments.
Whether it is your gown, the bridesmaid dresses, or the groom’s suit, make sure each outfit fits comfortably.
Quick tip: Take a trusted friend or family member with you. A second pair of eyes can help spot things you might overlook.
Maya once told me she was afraid of missing important moments. She wanted her dad’s smile when he first saw her dress, the quiet laughter with her maid of honor before the ceremony, and the excitement of her first dance. To help her feel calm, we made a simple photo list together.
We divided it into two parts:
After that, she shared the list with her photographer and planner so everyone knew what mattered most to her.
Around this time, Maya started feeling nervous about whether everything was on track. So, one weekend, we sat together and emailed every vendor. We checked all the details and confirmed arrival times, final payments, and delivery schedules.
This gave her so much peace of mind because everything was clear and written down.
Here is what you can confirm:
A few weeks before the wedding, Maya sat down with a cup of tea and her favorite notebook.
She started writing her vows, smiling at the memories that came to mind. She rewrote them a few times until the words felt right.
I told her that vows do not need to sound perfect; they just need to feel honest and heartfelt.
Small exercise: Write a few lines each week about what your partner means to you. When the day comes, you will already have the words that capture your love story.
Pro Tip:
This is the time when emotions start to rise and the days feel shorter. Try to pause and take a quiet evening just for yourself. Maya used to light a candle and listen to her favorite songs while imagining her wedding day. That small ritual helped her stay calm and remember what it was all about.
Goal:
Bring and check all the final details together so everything feels calm, organized, and ready for the big day.
I remember when Maya reached the one-month mark. She was both excited and nervous because everything felt so close, yet a few details were still hanging.
One evening, we sat together with tea and went through each step to make sure nothing was left behind.
I told Maya that having a clear timeline would make the day flow smoothly. We wrote down each moment in order, from when the hair and makeup artist would arrive to when the first dance would begin.
Once she finished, Maya shared it with her vendors and bridal party so everyone knew what was happening and when. It made her feel calm knowing everyone was on the same page.
You can do the same. Create your wedding day timeline where you will write your full schedule and share it with the people who will help make your day special.
Maya almost forgot this part until we checked her list again. A few days later, she visited her local marriage office, filled out the form, and paid about $60 for the license. Some places may charge more or have a short waiting period, so check the rules in your area early.
A few weeks before the wedding, Maya and I sat together to check RSVPs. A handful of guests still hadn’t replied, so she sent gentle reminders. Updating her list helped confirm seating, catering numbers, and final arrangements.
Once everything was set, Maya started packing for her honeymoon. She made a list of essentials like clothes, sunscreen, travel papers, and her camera. When Maya had her bag ready early, she was able to relax and enjoy the final countdown without rushing.
Pro Tip:
Spend one quiet evening each week reviewing small details. Put on your favorite music, light a candle, and make the process enjoyable. This stage is not about perfection but about peace of mind.
Goal: This stage is about tying up all the loose ends, confirming every detail, and doing final fittings so nothing is left to worry about.
Key Tasks:
I told Maya that this is the perfect time for a little self-care. She booked longer grooming sessions like hair coloring, facials, or even a massage to feel refreshed.
I teased her that she would be glowing even before the wedding day because she looked so relaxed after these sessions. The glam squad would still come on the morning of the wedding for hair and makeup, but this is the time to enjoy the process and experiment a little.
Maya looked a little nervous about saying her vows in front of everyone. I suggested she practice at home, maybe in front of a mirror or even read to her dog.
Her dog wagged his tail so much that it made her laugh and feel more at ease. Practicing helps the words flow naturally when the big moment comes.
Maya could hardly hide her excitement when her dress was ready. The dress had been carefully altered to fit her just right, the hem was finished, and it looked fresh and wrinkle-free.
She got a strong plastic bag from the tailor to keep it safe. She laughed and said her dress was going to travel like a little queen until the wedding day.
I woke up early that morning with a mix of excitement and nervousness but nothing compared to the moment I saw Maya getting ready. She looked radiant in her gown and I could not hold back my tears.
Honestly, it was one of the happiest days of my life, just witnessing her joy. I kept thinking, “How is it even possible to feel this much happiness in one day?”
Maya was laughing with her bridesmaids as they pinned flowers in their hair, tried on tiaras that were slightly too big, and smeared lipstick in all the wrong places. Every little mishap somehow made the morning even more memorable.
Planning a wedding can feel overwhelming at times, just like it did for Maya at the beginning. There are countless decisions, endless inspiration boards, and moments of stress.
But as we discovered together, breaking it down step by step makes the process joyful, manageable, and even fun.
Remember, it is your day. Embrace the process, trust your choices, and soak in the happiness. Like Maya, you will find that every step, from planning to “I do,” can be a wonderful part of the story you will cherish forever.